How to publish
Click on the Publish wizard icon  on the Bridge toolbar to open the Publish Wizard dialog.
Note
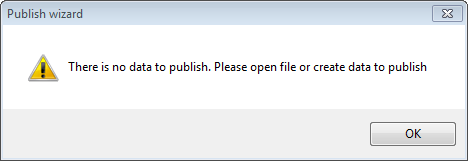
Before clicking on the Wizard button, please make sure that the map view contains supported feature layers and/or supported image layers. If there are no layers to be published, a warning dialog is shown:
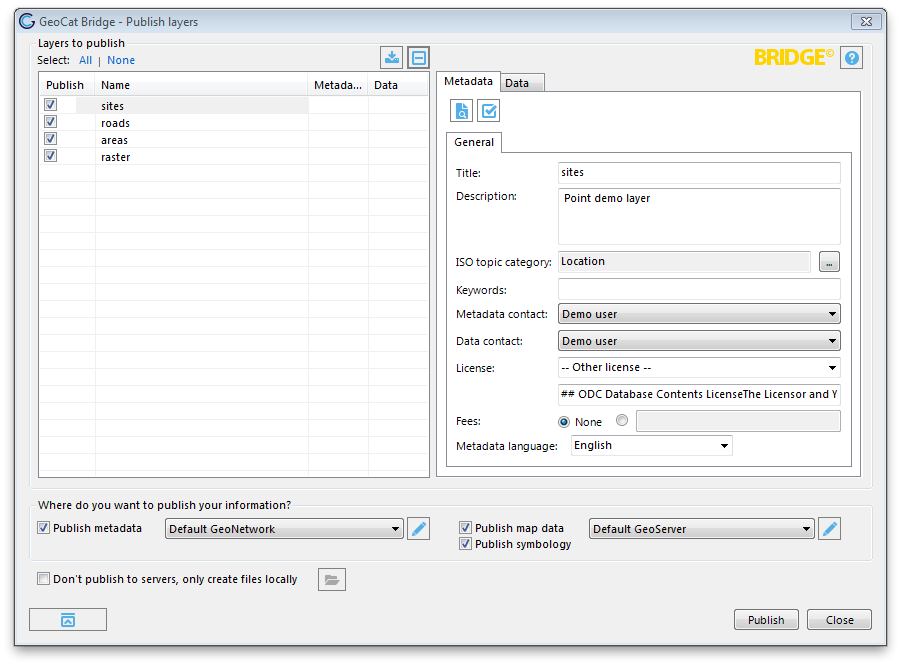
Publish Wizard dialog
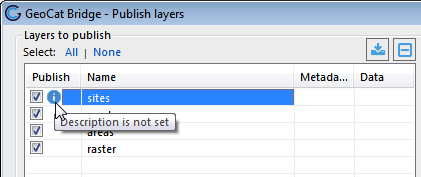
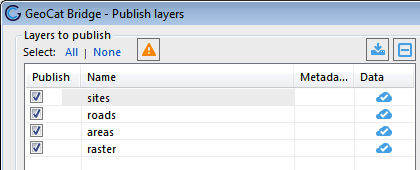
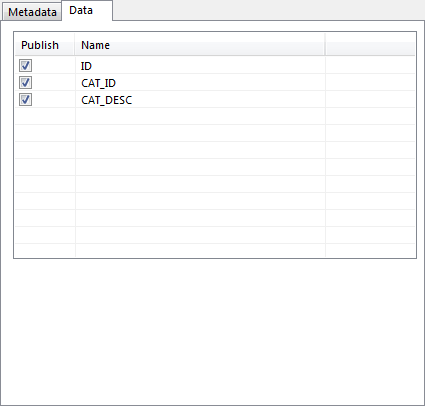
The Publish Wizard shows all the publishable layers in your project.
You can select the layers from the list to publish:
All: selects all the layers in the list.
None: deselects all the layers in the list.
An icon  is shown in the corresponding column after the
layer’s metadata and/or map data has been published.
is shown in the corresponding column after the
layer’s metadata and/or map data has been published.
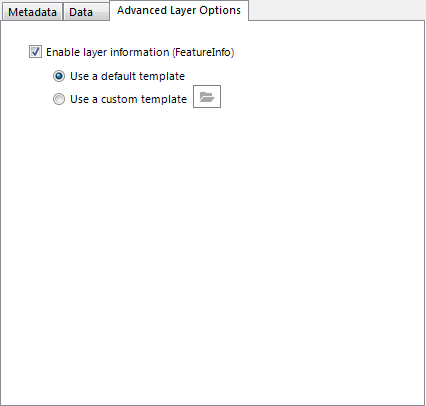
MapServer featureinfo template
When publishing to a MapServer server the tab Advanced Layer Options will be visible. Here you can configure Bridge to use the default template to generate the featureinfo response or set a custom one. Note, this feature is only available for MapServer.
The default template generated by Bridge includes all the attributes that have been selected to be published (under the tab Data). For numeric fields Bridge will use the scale (i.e.the number of digits to the right of the decimal point) of that particular field. If the generated template does not contain the desired number of decimals for a particular field, you can:
- Create a new field in the dataset and set the correct scale for this
- Generate the template, by first publishing the files locally, modify the template and select this template as the custom template to use
The character encoding of the template is determined by the .cpg file that can be bundled with the Shapefile. If Bridge cannot determine the character encoding of a dataset Bridge will set it to “UTF-8”.
Customize default template
The default template can be customized by the user by editing the following files:
[INSTALLATION DIRECTORY]\templates\style.css[INSTALLATION DIRECTORY]\templates\footer.html
The style.css will be included as stylesheet in the default template. The footer.html file will be included below the table element containing the attribute information.
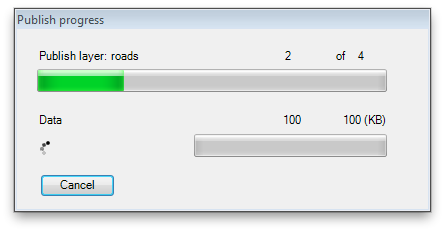
Publishing
When you finished configuring the properties for all map layers, click on the Publish button to start the publishing process. During this process, a progress bar is shown to indicate the status of the publishing:
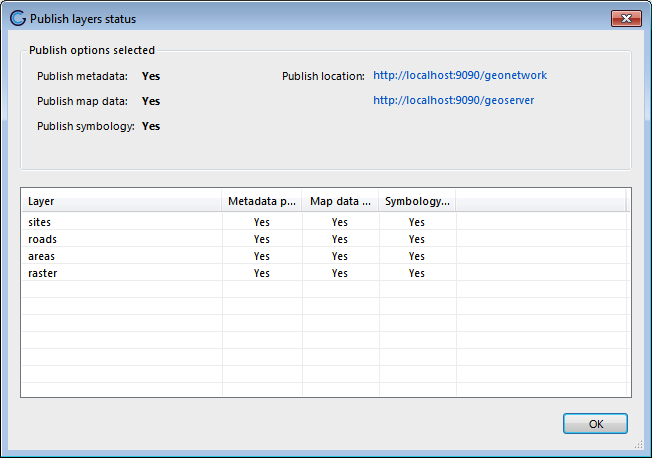
When the publishing is finished, a summary of the result is
shown:
Note
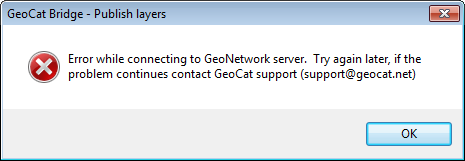
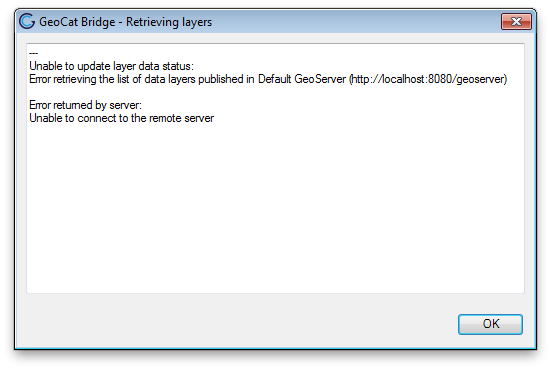
If a catalogue server (based on GeoNetwork Opensource) is not accessible during the publishing, the following dialog is shown:
Note
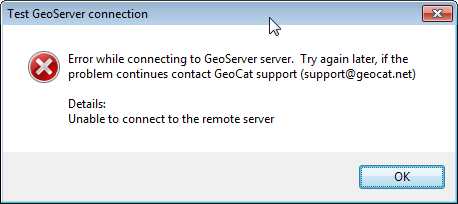
A similar dialog is shown when the map server is not accessible or doesn’t have the REST API configured properly:
View published data
 previews metadata of the selected layer. See
Metadata preview.
previews metadata of the selected layer. See
Metadata preview.
 creates a Web Map Context (OGC-WMC) file with the
selected layers to publish. To view the map layers online, the file can
be opened using a map viewer that supports WMC documents.
creates a Web Map Context (OGC-WMC) file with the
selected layers to publish. To view the map layers online, the file can
be opened using a map viewer that supports WMC documents.
The context menu in the layers list provides a quick access to
view the published data:
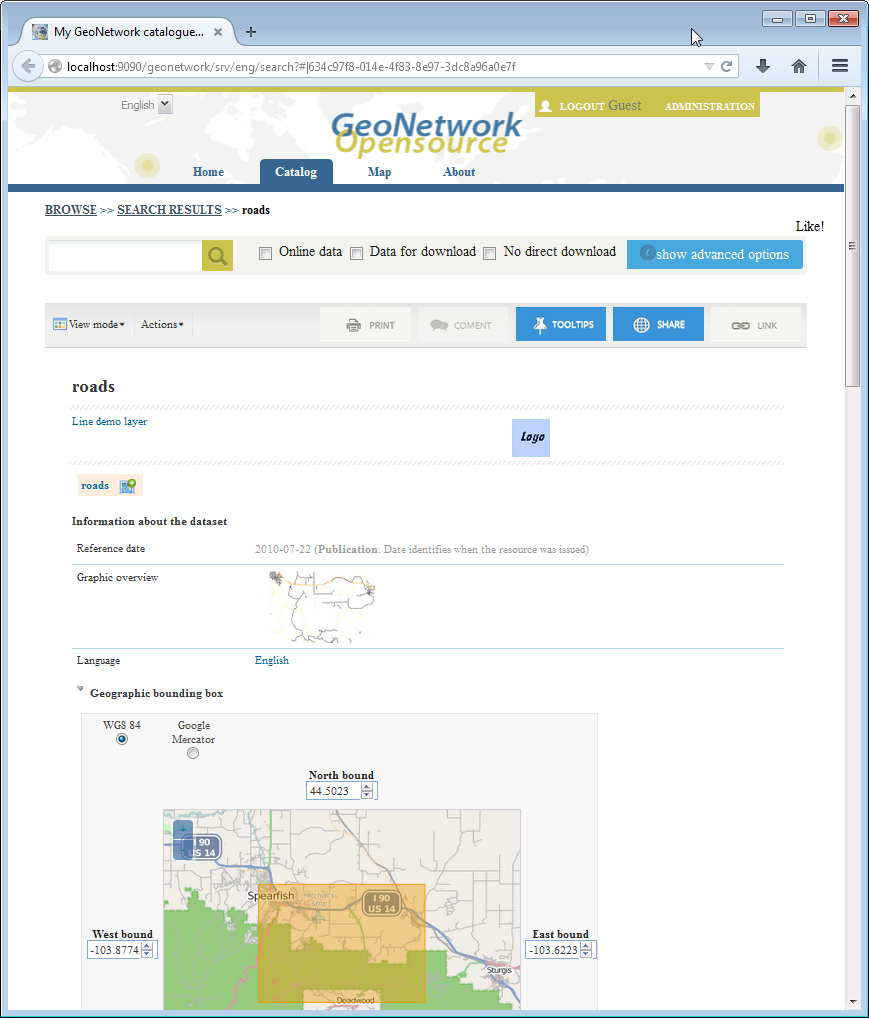
- View published metadata: If the metadata
is already published in a catalogue server, this option opens a
browser to show the metadata from the server.
- View published layer: If the map data is
already published in a map server, this option opens a browser to
preview the layer in a map viewer.
 is shown if the retrieving data from the servers
failed.
is shown if the retrieving data from the servers
failed.
Click the icon to see the error in details:
Withdraw published data
 removes both the metadata and map data of all
selected layers from the publishing server(s).
removes both the metadata and map data of all
selected layers from the publishing server(s).
If you want to withdraw only metadata or map data, you could use
the context menu in the layers list: (See :ref:`Context menu <context_menu>`)
- Withdraw published metadata: remove the
metadata from the catalogue server.
- Withdraw published layer: remove the
map data from the map server.
Warning
Use this option with caution as the metadata and data
are removed from the servers.Note that local metadata and map data are not
removed.
Advanced publishing options
Click the Advanced button to
customize the publishing options. By default, map data and metadata are
published on the default map and catalogue servers.
- Select to publish: publishes
metadata, map data, symbology or a combination of these three
- Select an alternative server to publish
the data (only available in the Premium version): in the
Premium version, alternative servers can be configured using the
Server Configuration panel. See Server
configuration.
- Offline publishing: It is
possible to save metadata and symbology of the map (Styled Layer
Descriptor - SLD documents for GeoServer and MapFile for MapServer) to a local folder on your computer.
Later on you can publish these files manually using the
administration interfaces that both GeoNetwork and GeoServer
provide. To save the files locally, click on the Advanced button and
select Publish offline, create
files locally.
By default, the files are created in the
My Documents folder. To select another
folder, click button 
- For saving metadata locally, you will need to configure a GeoNetwork connection, because Bridge needs to get the metadata profile from the GeoNetwork connection.
- For exporting the map data and symbology for GeoServer locally, you can simply select GeoServer from the right dropdown menu.
- For exporting the map data and symbology to MapServer locally, you will need to configure a MapServer connection first. Bridge needs the MapServer configuration parameters to correctly generate a MapFile.
 Manual
2.5
Manual
2.5
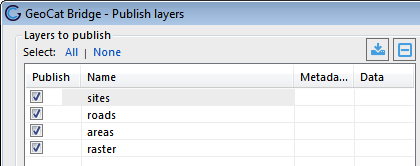
 is shown in the first column if the metadata is
incomplete. In this case the metadata can still be published, but is not
valid according to the selected metadata profile. Hold the mouse on the
cell of the Publish column for more information about the empty or invalid
fields. In the image below, the
is shown in the first column if the metadata is
incomplete. In this case the metadata can still be published, but is not
valid according to the selected metadata profile. Hold the mouse on the
cell of the Publish column for more information about the empty or invalid
fields. In the image below, the